

Anomaly Detection in NFA is a behavior-based traffic analysis engine that uses historical flow records collected for destination prefixes. It continuously evaluates traffic patterns and identifies deviations from established baselines that may indicate attacks or operational anomalies.
Unlike traditional threshold-based detection, which relies on fixed values, Anomaly Detection evaluates how traffic behaves over time. This allows NFA to identify anomalous activity that may not exceed an absolute threshold but still represents a significant deviation from the normal traffic pattern.
The targets of analysis are the destination prefixes specified by anomaly rules.
The primary objective of Anomaly Detection is to preserve service availability by detecting and mitigating volumetric and protocol-level attacks before they affect critical infrastructure.
2.7.1 Anomaly Categories #
NFA supports the detection of the following anomaly categories:
- DNS Amplification
- NTP Amplification
- SNMP Amplification
- Memcached Amplification
- SSH Flood
- UDP Flood
- TCP SYN Flood
- TCP ACK Flood
- TCP ACK Push Flood
- HTTP Flood
- HTTPS Flood
- SMURF
- CLDAP
- SSDP
These categories represent the supported attack signatures available when configuring anomaly rules and whitelist exceptions.
2.7.2 Anomaly Detection Rules #
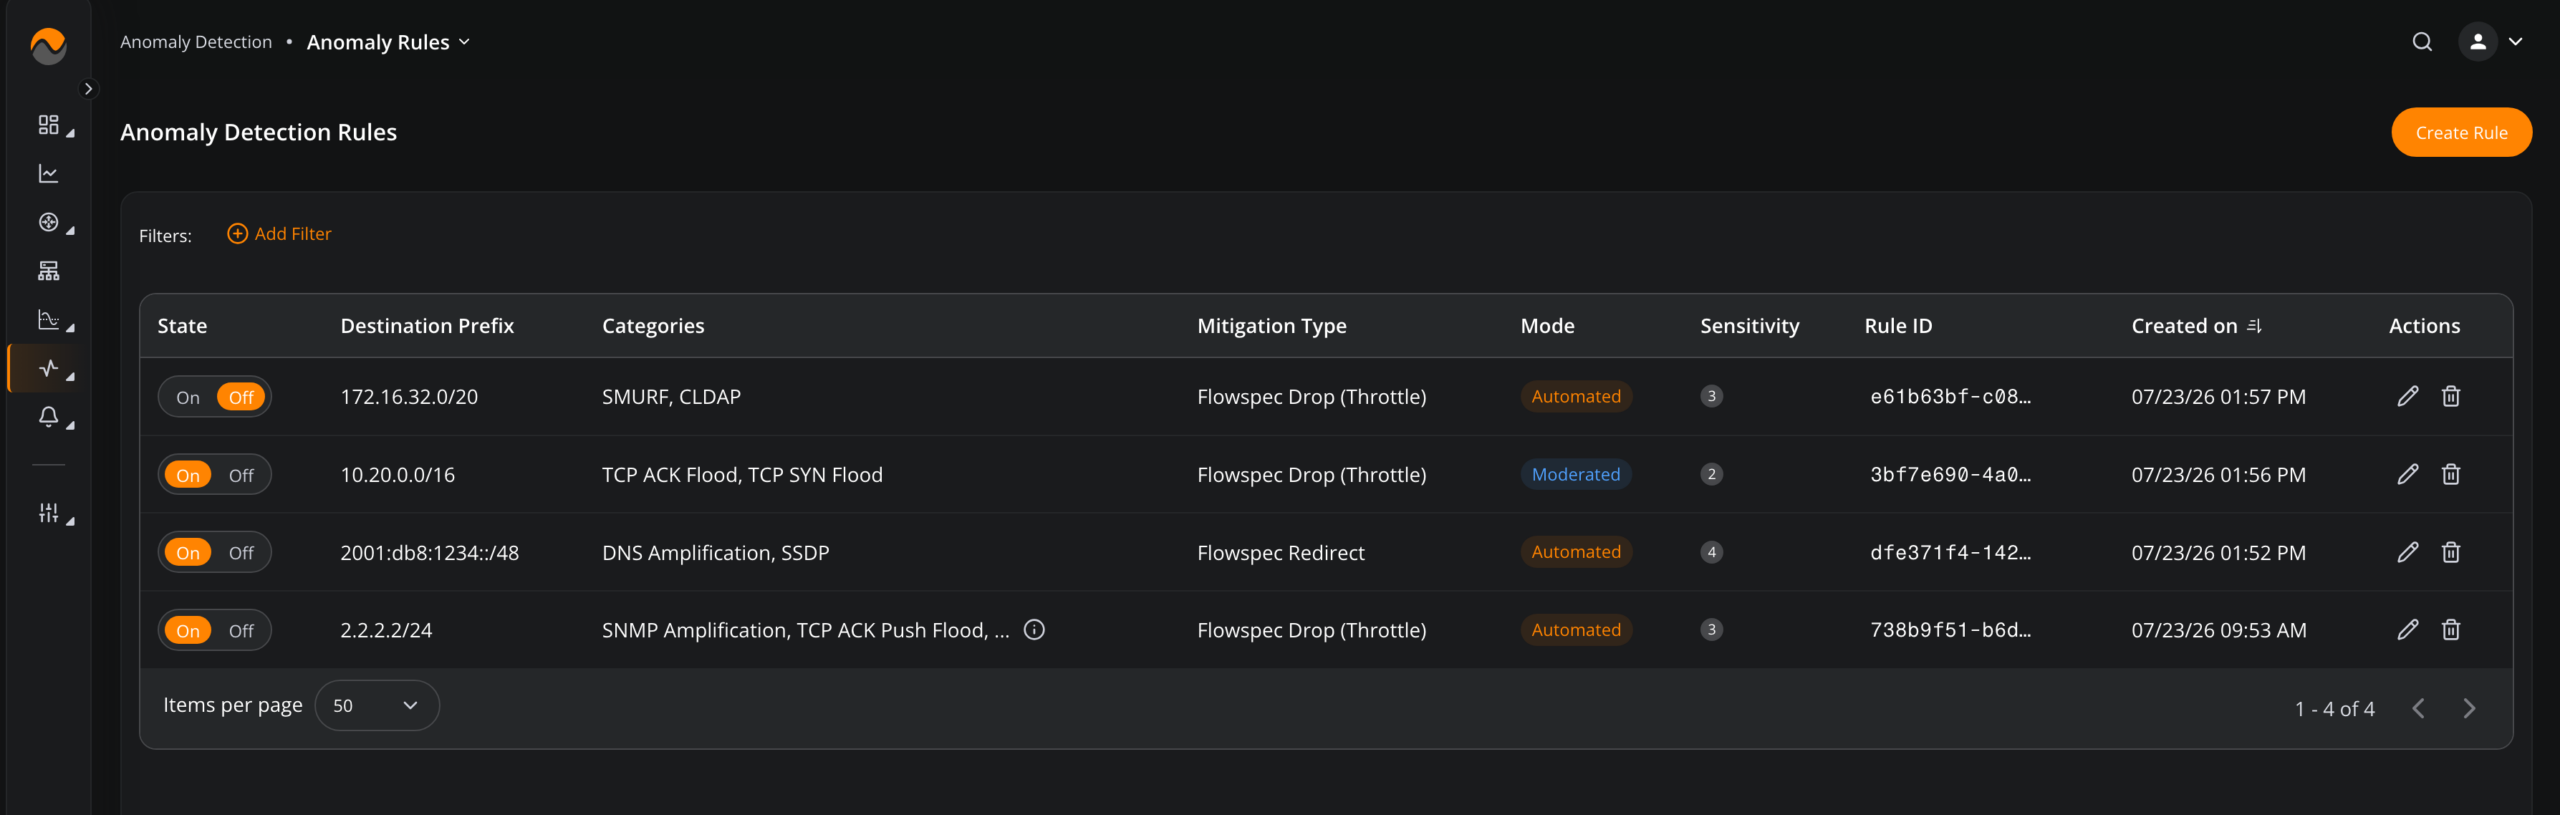
Anomaly rules define which destination prefixes should be analyzed, which anomaly categories should be detected, and how notification and mitigation actions should be performed.
Each anomaly rule includes:
- Destination Prefix: Defines the IP address or prefix to be monitored.
- Description: Provides optional information about the rule.
- Anomaly Categories: Defines the anomaly categories that trigger the rule. At least one category must be selected. All available categories can be selected using the Select All option.
- Sensitivity: Sets the detection threshold. Valid values range from 1 to 5. Higher values increase the frequency of alerts by triggering even on minor deviations.
- Mode: Determines whether mitigation is activated automatically or requires manual confirmation.
- Time Keep: Defines, in minutes, how long the anomaly remains active after mitigation is enabled.
- Mechanism: Defines the mitigation mechanism applied when an anomaly is detected.
- Announce Mode: Defines which BGP peers are used to announce the mitigation action.
- Notifications: Defines the notification destination associated with the rule.
- Rule Status: Determines whether traffic analysis starts immediately after the rule is saved.
To create an anomaly rule:
- Go to Anomaly Detection > Rules and click the Create Rule button.
- Enter the Destination Prefix that should be monitored.
- Enter an optional Description.
- Under Detection Logic, select at least one anomaly category. Click Select All to enable all available categories.
- Set the Sensitivity value from 1 to 5. Higher values increase the sensitivity of anomaly detection and may trigger alerts on smaller deviations from the established traffic pattern.
- Under Mitigation Strategy, select the required Mode:
• Automated: Activates mitigation automatically when an anomaly is detected.
• Moderated: Requires manual confirmation before mitigation is activated. - Specify the Time Keep value in minutes.
- Select one of the available mitigation mechanisms:
• Flowspec Drop (Throttle)
• Flowspec Redirect - Under Network & BGP, select the required Announce Mode.
- Under Notifications, select the destination to which anomaly notifications should be sent.
- Under Rule Status, select On to start analyzing traffic immediately after the rule is saved. Select Off to save the rule without activating it.
- Save the rule.
2.7.3 Anomaly Feed #
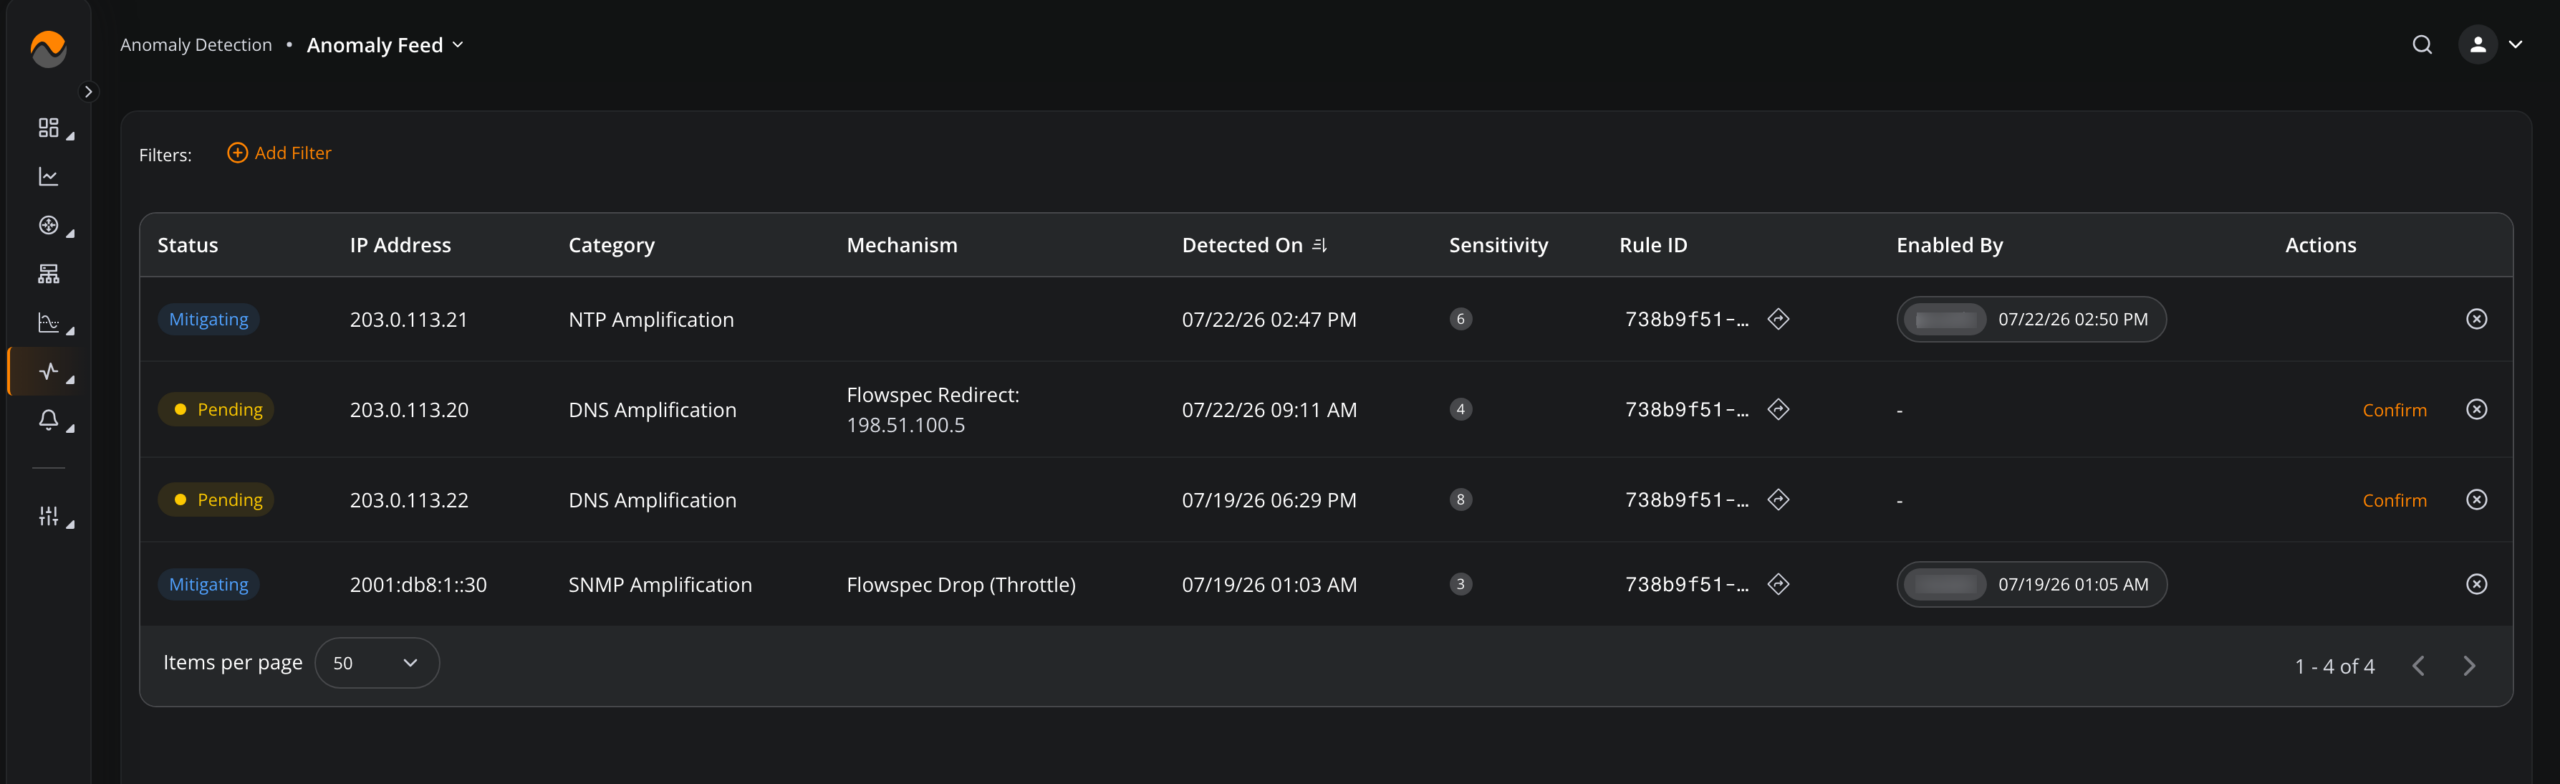
The Feed section contains live anomalies detected by the system.
Go to Anomaly Detection > Feed to view the following information:
- Status: Indicates the current anomaly state, such as Pending or Mitigating.
- IP Address: The destination address affected by the anomaly.
- Category: The detected anomaly category.
- Mechanism: The mitigation mechanism configured for the anomaly.
- Detected On: The date and time when the anomaly was detected.
- Sensitivity: The sensitivity value associated with the detected anomaly.
- Rule ID: The identifier of the anomaly rule that detected the activity.
- Enabled By: The user or system that enabled mitigation and the corresponding date and time.
Anomalies detected by rules operating in Moderated mode remain in the Pending state until mitigation is confirmed. Click Confirm to activate the configured mitigation mechanism.
Use the remove icon in the Actions column to remove an anomaly from the active feed.
2.7.4 Anomaly History #
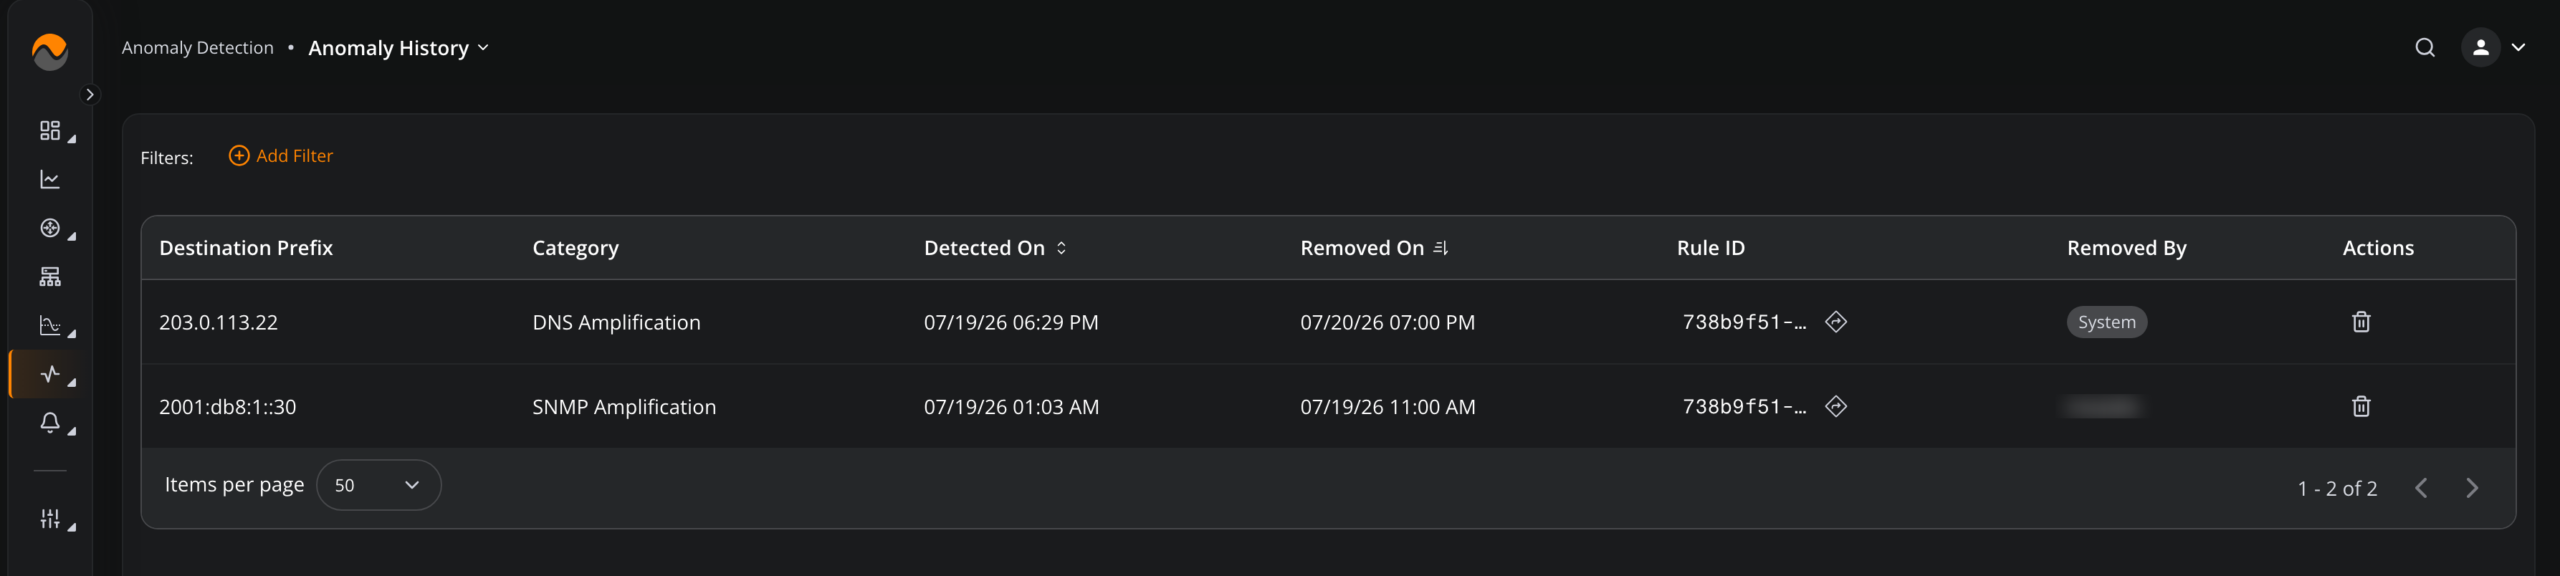
The History section contains anomalies that have been removed from the active feed.
Go to Anomaly Detection > History to view the following information:
- Destination Prefix: The IP address associated with the anomaly.
- Category: The detected anomaly category.
- Detected On: The date and time when the anomaly was detected.
- Removed On: The date and time when the anomaly was removed.
- Rule ID: The identifier of the anomaly rule associated with the event.
- Removed By: The user or system that removed the anomaly.
Historical entries retain the anomaly rule metadata captured at the time of detection and can be used for auditing, reporting, and post-incident analysis.
Use the delete icon in the Actions column to delete a historical entry.
2.7.5 Anomaly Whitelist #
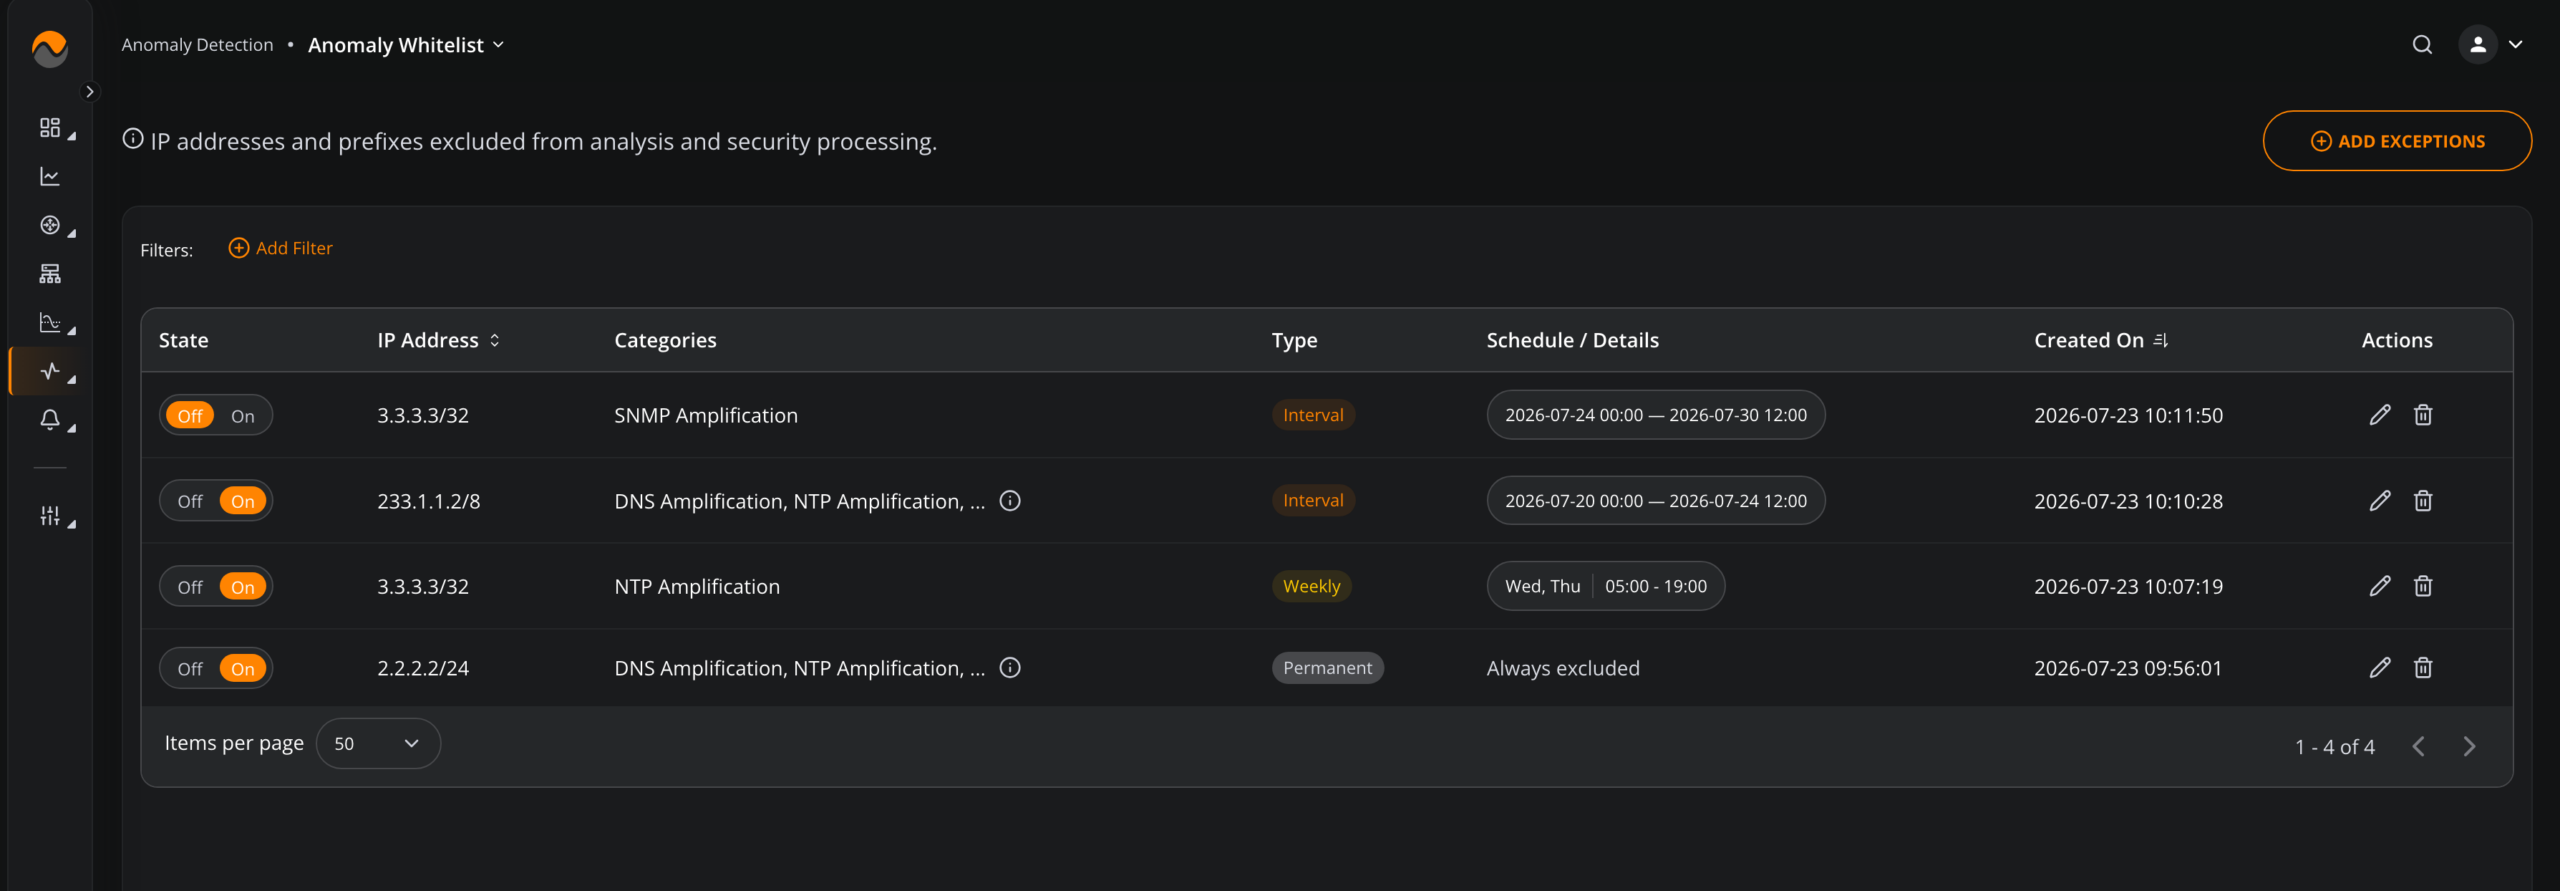
The Whitelist section allows specific destination prefixes and anomaly categories to be excluded from analysis and security processing.
Go to Anomaly Detection > Whitelist to view the configured exceptions. The directory displays the following information:
- State: Indicates whether the whitelist exception is turned On or Off.
- IP Address: The destination prefix excluded from anomaly analysis.
- Categories: The anomaly categories covered by the exception.
- Type: The configured whitelist mode.
- Schedule / Details: The schedule during which the exception is active.
- Created On: The date and time when the exception was created.
Use the available action icons to edit or delete an exception. The Add Filter option can be used to limit the entries displayed in the table.
The following whitelist modes are available:
- Permanent: Excludes the destination prefix from analysis indefinitely. This mode overrides all other scheduled modes.
- Weekly: Repeats the exclusion every week on the selected weekdays and during the configured time period.
- Monthly: Repeats the exclusion every month on the selected days and during the configured time period.
- Interval: Activates the exclusion once during the specified date and time interval.
To configure an anomaly whitelist exception:
- Go to Anomaly Detection > Whitelist and click the ADD EXCEPTIONS button.
- Specify the Destination Prefix that should be excluded from anomaly analysis.
- Select at least one anomaly category, or click Select All to include all available categories.
- Enable the required whitelist mode.
- For a Weekly, Monthly, or Interval exception, configure the applicable days, dates, and time values.
- Click Apply to save the exception.
Note: If a destination prefix requires multiple weekday and time combinations, create a separate whitelist exception for each time window.
While an exception is active, flow records continue to be exported to NFA. However, the flow records covered by the exception are not stored in memory for anomaly analysis and do not generate anomalies.